Gradient Shimming With 1H Signal
Most autoshimming with gradients (gradient shimming) is done with a strong deuteron (2H) signal from deuterated solvent. In cases where a strong 2H signal isn't present when the solvent isn't deuterated, a strong 1H signal can be used to perform gradient-aided shimming. This is often the case for biological samples dissolved in water, either pure H2O or ~90% H2O/10% D2O. If a deuteron signal isn't present at all, lock has to be turned off; the experiment must be run un-locked. General background on gradient shimming can be found here. The following outlines the steps to perform gradient shimming with a strong 1H signal.NOTE:
- If the sample is locked before gradient shimming, the lock may be lost after gradient shimming, mostly due to lock issues on the new 400. You need to re-establish lock either by auto- or manual locking.
- Importantly, for unlocked experiments, (1) make sure lock is turned OFF and also enter alock='n' at the command line to defeat autolocking before acquisition, and (2) care must be taken to reference the spectrum.
- You may generate a map file using a typical solvent you are using (~ 700uL), and use the same map for the set of samples you'll be collecting data from. There is no need to make a new map for each sample.
- To revert the shimmap to the default 2H map, you may select it under the gmapsys menu or simply enter init1h. The macro will load default shims along with the default shimmap.
Steps:
1. Collect a simple 1H spectrum.
Assuming the presence of a strong 1H signal, receiver gain has to be dropped, likely all the way to zero and the flip angle has to be reduced drastically to prevent receiver and ADC overflow. You may enter gain=0 pw=1 nt=1 go. Save the 1H spectrum for referencing purpose later.2. Enter gmapsys. Go to Acquire->Gradient Shim
- Enter gmapsys to enter the gradient shimming experiment. Here the default shim map, likely a map based on 2H signal, is listed under Curent_mapname. If a recent default 1H shim map is available, you may select it. Then, make sure Shim Z1-Z4 First is checked.
- Before proceeding any further, for unlocked experiment, go to Start->Lock and turn lock OFF by unchecking the scan button.
- Click Gradient Autoshim on Z to perform autoshim.
Alternatively, generate your own shim map with current sample
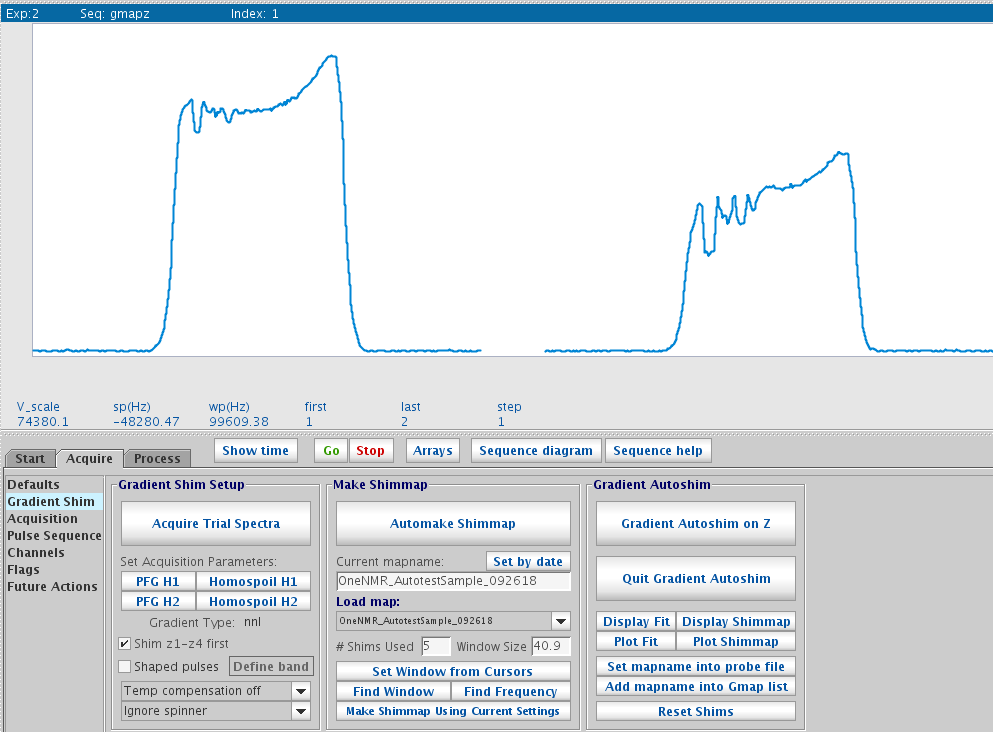
You may want to generate your own shim map with the current sample and shim using this map later. To generate a map:- Click PFG H1. Then enter tpwr=60 pw=2 nt=1 gain=2 from command line. Click Acquire Trial Spectra. Two spectra will be acquired in an array. Ideally the second one should be about 50-70% of the height of the first one. If the second one is too high, adjustment should be made to the parameter d3 in the following way.
- To adjust d3, go to Process->Text Output panel, take a look of two current values. It'll be ~ 0 and 0.005.
The unit is second. You can raise the second one, for example by entering d3=0,0.02. If the second spectrum is too weak,
you need to reduce the second d3 value. Once done, click Acquire Trial Spectra to view the changes.
Note: The non-smoothness of the spectra isn't typical of normal curves. This has to do with current, specific issues with the 400 instrument.
Trial spectra
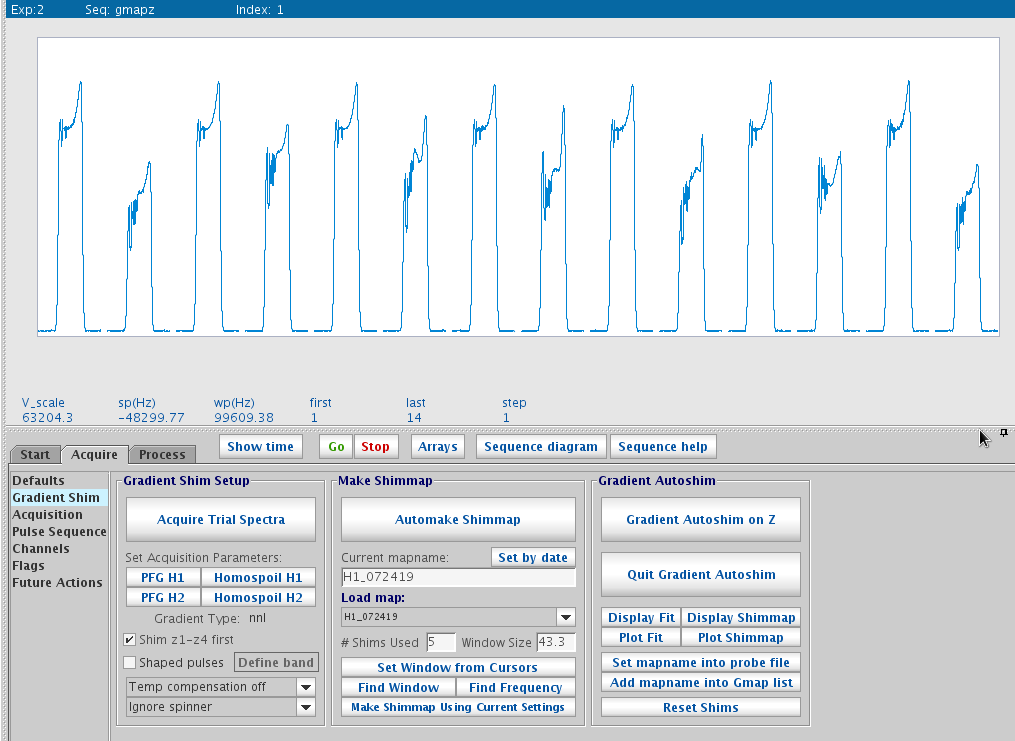
Mapping shims - Once trial spectra look good, click Automake Shimmap. When prompted, enter a map name with the nucleus, date, maybe volume of the sample, i.e. H1_072519_700uL. This process will then create a set ~ 14 spectra shown onscreen.
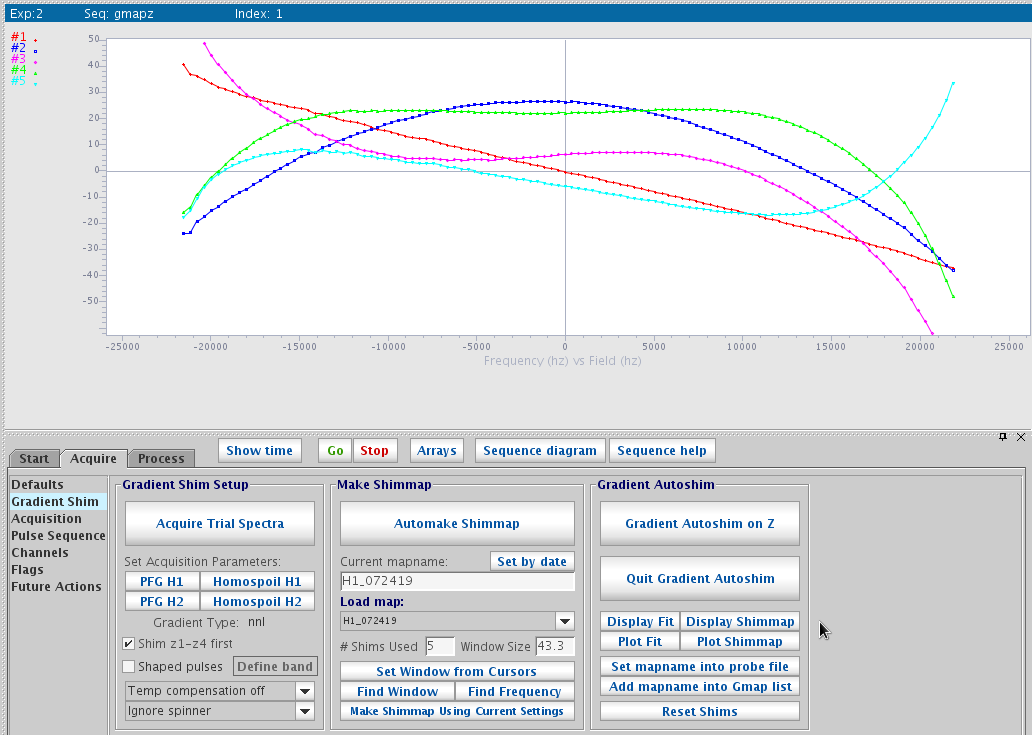
- Once done, click Display Shimmap to show Z1 to Z5 maps. They should be mostly smooth and follow the spherical
function shapes of each order.

Display shimmap - Once the maps are created, you may click Autoshim on Z. Make sure Shim Z1-Z4 first is checked and #shims used is 5.
3. Quit gmapsys and gradient shim experment
Updated, July 2019, H. Zhou
©2019 The Regents of the University of California. All Rights Reserved. UC Santa Barbara, Santa Barbara, CA 93106

